

Building a Portable Kubernetes Security Lab with Minikube and Kubernetes Goat
A practical lab you can run from Windows, Linux, or macOS
Yo, what's up cyber folks! My name name's Santosh, and I'm a cyber enthusiast with a serious passion to learn hacking and red team shenanigans.
If you are learning Kubernetes security, one of the best ways to understand how pods, service accounts, RBAC, secrets, host mounts, container runtimes, and cluster networking fit together is to build a deliberately vulnerable cluster and attack it yourself.
For this lab, I use Kubernetes Goat on top of Minikube.
The goal is not to build a production-like Kubernetes platform. The goal is to create a lab that is:
easy to deploy,
easy to destroy and rebuild,
isolated from the host operating system,
portable across Windows, Linux, and macOS,
and powerful enough for Kubernetes security testing.
The basic design looks like this:
Windows / Linux / macOS
        |
        v
   Ubuntu VM
        |
        +-- Docker Engine
        +-- kubectl
        +-- Helm
        +-- Minikube
               |
               v
        Kubernetes cluster
               |
               v
        Kubernetes Goat
On Linux, you can technically install the stack directly on the host. I still prefer putting a deliberately vulnerable Kubernetes environment inside a VM because it makes cleanup, snapshots, networking, and isolation much easier.
On Windows and macOS, the VM-based design is especially convenient. VMware, VirtualBox, Hyper-V, Parallels, or another hypervisor can be used depending on the host.
Why use an Ubuntu VM?
A Kubernetes security lab intentionally contains weak configurations and vulnerable workloads. Keeping everything inside a disposable VM gives you a clean boundary between the host and the cluster.
For example:
Host OS
  |
  +-- Browser
  +-- SSH client
  +-- Burp / terminal / notes
  |
  v
Ubuntu VM
  |
  +-- Docker
  +-- Minikube
  +-- Kubernetes Goat
If something breaks badly, you can simply revert the VM snapshot or rebuild it.
This also avoids installing a large number of Kubernetes packages directly on your primary workstation.
1. Host operating system options
The same general lab can be used from all three major desktop operating systems.
Windows
A practical setup is:
Windows
  |
  +-- VMware Workstation / Hyper-V / VirtualBox
        |
        v
     Ubuntu Server VM
        |
        v
     Minikube + Kubernetes Goat
macOS
A practical setup is:
macOS
  |
  +-- VMware Fusion / Parallels / UTM
        |
        v
     Ubuntu Server VM
        |
        v
     Minikube + Kubernetes Goat
This works on both Intel Macs and Apple Silicon Macs. Some older vulnerable container images may contain architecture-specific binaries; I cover how to diagnose that later.
Linux
On Linux you have two choices:
Linux host
  |
  +-- Docker + Minikube directly
or the more isolated approach:
Linux host
  |
  +-- KVM / VMware / VirtualBox
        |
        v
     Ubuntu Server VM
        |
        v
     Docker + Minikube
For a security lab, I prefer the second approach.
2. Recommended VM sizing
For Kubernetes Goat, I recommend approximately:
Ubuntu VM
---------
RAM:   10-12 GB
vCPU:  4-6
Disk:  50-60 GB
Then allocate roughly the following to Minikube:
Minikube
--------
CPU:    4
Memory: 8192 MB
If your host only has 16 GB RAM, reduce the Minikube allocation accordingly.
For a machine with 24 GB RAM, a 12 GB Ubuntu VM is a comfortable setup.
3. Install Ubuntu Server
I prefer Ubuntu Server over Ubuntu Desktop for this lab.
You do not need a GUI inside the VM because the lab is managed through SSH and command-line tools.
Ubuntu Server also consumes less memory and CPU, leaving more resources for Kubernetes.
After installation, connect to the VM over SSH:
ssh <user>@<ubuntu-vm-ip>
For example:
ssh [email protected]
4. Update Ubuntu and install basic tools
Start by updating the VM:
sudo apt update
sudo apt upgrade -y
Install the basic dependencies:
sudo apt install -y \
  ca-certificates \
  curl \
  git \
  gnupg
It is also useful to confirm the CPU architecture:
uname -m
Typical outputs include:
x86_64
or:
aarch64
You normally do not need to change the main lab workflow based on this. The architecture only becomes important if an old container image contains a binary built for a different CPU architecture.
5. Install Docker Engine
Remove conflicting packages if they are present:
sudo apt remove -y \
  docker.io \
  docker-compose \
  docker-compose-v2 \
  docker-doc \
  podman-docker \
  containerd \
  runc
Create the Docker keyring directory:
sudo install -m 0755 -d /etc/apt/keyrings
Add Docker's signing key:
sudo curl -fsSL \
  https://download.docker.com/linux/ubuntu/gpg \
  -o /etc/apt/keyrings/docker.asc
sudo chmod a+r /etc/apt/keyrings/docker.asc
Add the Docker repository:
sudo tee /etc/apt/sources.list.d/docker.sources <<'DOCKER_EOF'
Types: deb
URIs: https://download.docker.com/linux/ubuntu
Suites: $(. /etc/os-release && echo "${UBUNTU_CODENAME:-$VERSION_CODENAME}")
Components: stable
Architectures: $(dpkg --print-architecture)
Signed-By: /etc/apt/keyrings/docker.asc
DOCKER_EOF
Install Docker:
sudo apt update
sudo apt install -y \
  docker-ce \
  docker-ce-cli \
  containerd.io \
  docker-buildx-plugin \
  docker-compose-plugin
Enable Docker:
sudo systemctl enable --now docker
Test it:
sudo docker run hello-world
6. Allow the normal user to run Docker
Add your user to the Docker group:
sudo usermod -aG docker $USER
Apply the new group membership:
newgrp docker
Verify that Docker works without sudo:
docker ps
7. Install Minikube
We can make the Minikube installation automatically select the correct Linux binary:
ARCH=$(uname -m)

case "$ARCH" in
  x86_64)
    MINIKUBE_ARCH=amd64
    ;;
  aarch64|arm64)
    MINIKUBE_ARCH=arm64
    ;;
  *)
    echo "Unsupported architecture: $ARCH"
    exit 1
    ;;
esac
Download Minikube:
curl -LO \
https://github.com/kubernetes/minikube/releases/latest/download/minikube-linux-${MINIKUBE_ARCH}
Install it:
sudo install \
  minikube-linux-${MINIKUBE_ARCH} \
  /usr/local/bin/minikube
Remove the downloaded file:
rm minikube-linux-${MINIKUBE_ARCH}
Verify:
minikube version
8. Install kubectl
Minikube can download and use its own kubectl binary:
minikube kubectl -- version --client
However, Kubernetes Goat scripts expect the normal kubectl command to be available in the shell.
Add the Kubernetes package repository:
sudo apt-get update
sudo apt-get install -y ca-certificates curl gnupg
sudo mkdir -p -m 755 /etc/apt/keyrings
curl -fsSL \
  https://pkgs.k8s.io/core:/stable:/v1.37/deb/Release.key | \
  sudo gpg --dearmor \
  -o /etc/apt/keyrings/kubernetes-apt-keyring.gpg
Add the repository:
echo 'deb [signed-by=/etc/apt/keyrings/kubernetes-apt-keyring.gpg] https://pkgs.k8s.io/core:/stable:/v1.37/deb/ /' | \
  sudo tee /etc/apt/sources.list.d/kubernetes.list
Install kubectl:
sudo apt-get update
sudo apt-get install -y kubectl
Verify:
kubectl version --client
9. Start Minikube
For this lab I use Docker as the Minikube driver:
minikube start \
  --driver=docker \
  --cpus=4 \
  --memory=8192
This gives us the following stack:
Ubuntu VM
  |
  +-- Docker
        |
        +-- Minikube node
              |
              +-- Kubernetes
Using the Docker driver means we do not need another VM inside the Ubuntu VM.
Verify Minikube:
minikube status
Then verify the Kubernetes node:
kubectl get nodes -o wide
The node may briefly show NotReady immediately after startup while networking and kubelet initialization complete.
Re-run the command after a short period and it should become:
Ready
Confirm administrative access:
kubectl auth can-i '*' '*' --all-namespaces
For a normal Minikube lab, the result should be:
yes
10. Install Helm
Kubernetes Goat uses Helm for some of its scenarios.
Download the Helm installer:
curl -fsSL \
https://raw.githubusercontent.com/helm/helm/main/scripts/get-helm-3 \
-o get_helm.sh
Run it:
chmod 700 get_helm.sh
./get_helm.sh
Verify:
helm version
11. Deploy Kubernetes Goat
Clone the repository:
cd ~
git clone https://github.com/madhuakula/kubernetes-goat.git
Enter the repository:
cd kubernetes-goat
Deploy the vulnerable scenarios:
bash setup-kubernetes-goat.sh
Watch the pods:
kubectl get pods -w
You should gradually see the workloads transition through states such as:
ContainerCreating
PodInitializing
Running
Completed
Press Ctrl+C when the deployment settles.
Then check all namespaces:
kubectl get pods -A
12. Useful Kubernetes troubleshooting commands
If a pod does not start, these are the commands I use first.
List pods:
kubectl get pods -A
Describe a pod:
kubectl describe pod <pod-name> -n <namespace>
Read logs:
kubectl logs <pod-name> -n <namespace>
For a multi-container pod:
kubectl get pod <pod-name> \
  -n <namespace> \
  -o jsonpath='{.spec.containers[*].name}'
Then:
kubectl logs <pod-name> \
  -n <namespace> \
  -c <container-name>
A particularly useful filtered view is:
kubectl get pods -A | grep -v -E 'Running|Completed'
13. Handling exec format error
One interesting issue I encountered while building this lab was:
exec /usr/local/bin/gotty: exec format error
This happened even though the container image itself downloaded successfully.
That distinction is important.
A container image can support your CPU architecture while still containing an individual executable built for a different architecture.
Check the host architecture:
uname -m
Then inspect the binary inside the image:
docker run --rm \
  --entrypoint /bin/sh \
  <image-name> \
  -c 'uname -m; file /usr/local/bin/gotty'
For example, a correct 64-bit ARM result looks similar to:
aarch64
/usr/local/bin/gotty: ELF 64-bit ... ARM aarch64 ...
If these do not match, rebuild the affected component rather than replacing the entire lab.
14. Fixing the Kubernetes Goat GoTTY issue
Some Kubernetes Goat scenarios use an old GoTTY binary. On certain systems, the packaged binary can be incompatible with the current CPU architecture.
In my setup, this affected:
system-monitor
hunger-check
The fix was to compile GoTTY from source inside the image.
Rebuild system-monitor
Go to the image directory:
cd ~/kubernetes-goat/infrastructure/system-monitor
Back up the original Dockerfile:
cp Dockerfile Dockerfile.bak
Use the following Dockerfile:
FROM golang:1.17-bullseye AS gotty-builder

ENV GO111MODULE=off
ENV GOPATH=/go

RUN mkdir -p /go/src/github.com/yudai && \
    git clone --depth 1 --branch v2.0.0-alpha.3 \
    https://github.com/yudai/gotty.git \
    /go/src/github.com/yudai/gotty

WORKDIR /go/src/github.com/yudai/gotty

RUN go get ./... && \
    mkdir -p /out && \
    go build -o /out/gotty .

FROM ubuntu:noble
LABEL MAINTAINER="Madhu Akula" INFO="Kubernetes Goat"

RUN apt-get update && \
    apt-get install -y htop libcap2-bin curl wget file && \
    rm -rf /var/lib/apt/lists/*

COPY --from=gotty-builder /out/gotty /usr/local/bin/gotty
RUN chmod +x /usr/local/bin/gotty

EXPOSE 8080

CMD [ "gotty", "-w", "bash" ]
Build it:
docker build --no-cache \
  -t k8s-goat-system-monitor-local:latest .
Verify the binary:
docker run --rm \
  --entrypoint /bin/sh \
  k8s-goat-system-monitor-local:latest \
  -c 'uname -m; file /usr/local/bin/gotty'
Load the image into Minikube:
minikube image load k8s-goat-system-monitor-local:latest
Verify:
minikube image ls | grep system-monitor
Update the deployment:
kubectl set image deployment/system-monitor-deployment \
  system-monitor=k8s-goat-system-monitor-local:latest
Make sure Kubernetes uses the local image:
kubectl patch deployment system-monitor-deployment \
  -p '{"spec":{"template":{"spec":{"containers":[{"name":"system-monitor","imagePullPolicy":"IfNotPresent"}]}}}}'
Wait for the rollout:
kubectl rollout status deployment/system-monitor-deployment
Check the result:
kubectl get pods
The pod should now become:
1/1 Running
Fixing hunger-check
If hunger-check shows the same exec format error, apply the same GoTTY build strategy to:
~/kubernetes-goat/infrastructure/hunger-check
Build a local image, load it into Minikube, and update the deployment in the big-monolith namespace.
First locate it:
kubectl get deployment -A | grep hunger
Then update it:
kubectl set image deployment/hunger-check-deployment \
  hunger-check=k8s-goat-hunger-check-local:latest \
  -n big-monolith
Set the pull policy:
kubectl patch deployment hunger-check-deployment \
  -n big-monolith \
  -p '{"spec":{"template":{"spec":{"containers":[{"name":"hunger-check","imagePullPolicy":"IfNotPresent"}]}}}}'
Finally:
kubectl rollout status \
  deployment/hunger-check-deployment \
  -n big-monolith
15. Start the Kubernetes Goat access script
Once the required pods are running, start the Kubernetes Goat port forwards:
cd ~/kubernetes-goat
bash access-kubernetes-goat.sh
The script exposes the lab services locally using ports in the range:
1230-1236
The main Kubernetes Goat interface is normally available at:
http://127.0.0.1:1234
Test it inside Ubuntu:
curl http://127.0.0.1:1234
16. Access the lab from the host machine
The Kubernetes Goat access script binds services to the Ubuntu VM's localhost.
Instead of exposing vulnerable services directly on the VMware network, I prefer SSH local forwarding.
From the host system, run:
ssh -N [email protected] \
  -L 1230:127.0.0.1:1230 \
  -L 1231:127.0.0.1:1231 \
  -L 1232:127.0.0.1:1232 \
  -L 1233:127.0.0.1:1233 \
  -L 1234:127.0.0.1:1234 \
  -L 1235:127.0.0.1:1235 \
  -L 1236:127.0.0.1:1236
Replace:
192.168.231.130
with the actual IP address of your Ubuntu VM.
The -N option tells SSH not to open an interactive shell and to maintain only the tunnels.
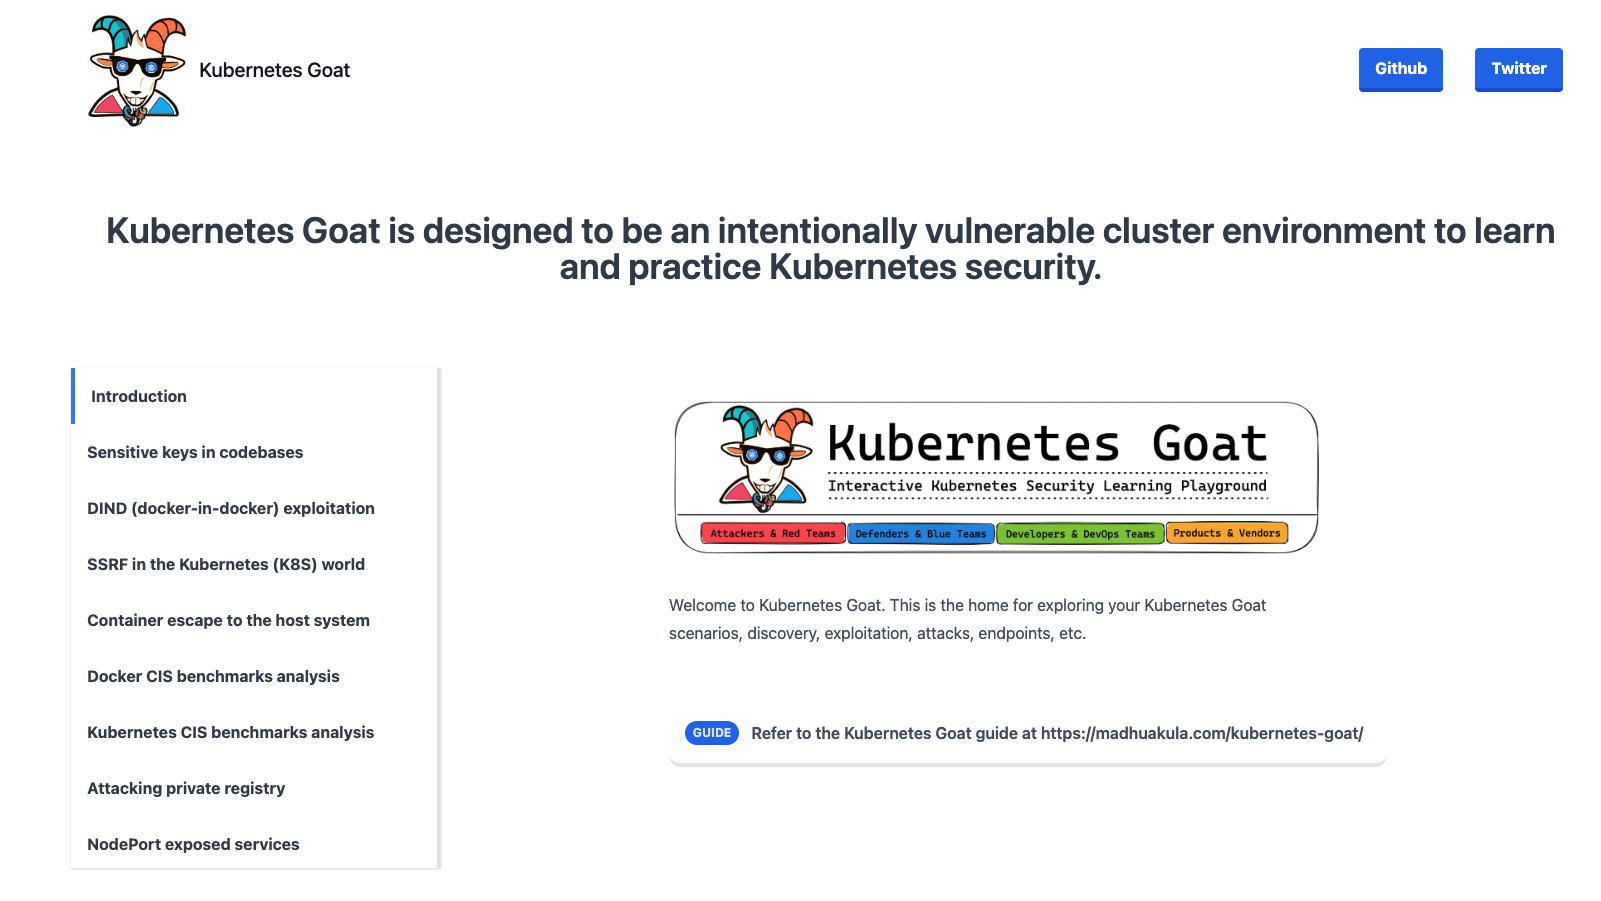
Now open the browser on Windows, Linux, or macOS and visit:
http://127.0.0.1:1234
The traffic path becomes:
Host browser
     |
     v
127.0.0.1:1234
     |
     v
SSH tunnel
     |
     v
Ubuntu VM localhost:1234
     |
     v
kubectl port-forward
     |
     v
Kubernetes Goat service
17. Make the local image fixes persistent
The good news is that you do not need to rebuild the custom images every time you shut down the Ubuntu VM.
Once the fixed system-monitor and hunger-check images are loaded into Minikube and the Deployments are updated to use them, that state is stored inside the Minikube cluster. A normal VM shutdown, reboot, or minikube stop does not remove it.
After rebooting the VM, start Minikube again:
minikube start
Then verify the cluster and workloads:
kubectl get nodes
kubectl get pods -A
The custom workloads should still be using the locally built images. You can verify them directly:
kubectl get deployment system-monitor-deployment \
  -o jsonpath='{.spec.template.spec.containers[0].image}{"\n"}'
kubectl get deployment hunger-check-deployment \
  -n big-monolith \
  -o jsonpath='{.spec.template.spec.containers[0].image}{"\n"}'
You should see the local image names, for example:
k8s-goat-system-monitor-arm64:latest
k8s-goat-hunger-check-arm64:latest
You can also confirm that Minikube still has the images:
minikube image ls | grep k8s-goat
After a reboot, the normal startup flow is simply:
minikube start
kubectl get pods -A
cd ~/kubernetes-goat
bash access-kubernetes-goat.sh
Then recreate the SSH port forwarding from the host machine.
A VM reboot is safe.
minikube stopis also safe. The command to avoid unless you intentionally want to rebuild the lab isminikube delete.
minikube delete
minikube delete removes the cluster, including the locally loaded custom images and Deployment changes. If you delete the cluster, you will need to rebuild or reload the custom images and apply the image changes again.
There is one other case to be aware of: rerunning the Kubernetes Goat setup script may reapply the original manifests and reset the Deployment image references back to the upstream images.
For day-to-day lab use, the easiest approach is therefore:
Keep the Ubuntu VM and Minikube cluster.
Use
minikube stopor shut down the VM when finished.Use
minikube startafter the next boot.Avoid
minikube deleteunless you want a clean rebuild.Do not rerun
setup-kubernetes-goat.shunless you actually need to redeploy the lab.
This keeps the lab simple and avoids maintaining exported Deployment YAML files just for normal reboots.
18. Stop, start, or destroy the lab
Stop Minikube while keeping the cluster:
minikube stop
Start it again:
minikube start
Delete the entire cluster:
minikube delete
Remember that images loaded directly into Minikube disappear when the cluster is deleted.
Keep your custom Dockerfiles so they can be rebuilt quickly.
19. Final lab architecture
The final environment looks like this:
Windows / Linux / macOS
        |
        +-- Browser
        +-- SSH client
        |
        v
   Ubuntu Server VM
        |
        +-- Docker Engine
        +-- kubectl
        +-- Helm
        +-- Minikube
               |
               v
        Kubernetes cluster
               |
               v
        Kubernetes Goat
               |
               +-- vulnerable workloads
               +-- RBAC scenarios
               +-- secrets
               +-- host mounts
               +-- internal services
               +-- container security scenarios
And the access path remains isolated:
Host browser
    |
    v
SSH local forwarding
    |
    v
Ubuntu localhost
    |
    v
kubectl port-forward
    |
    v
Kubernetes Goat
20. Commands I use most often
Cluster status
minikube status
kubectl get nodes -o wide
Workloads
kubectl get pods -A
kubectl describe pod <pod> -n <namespace>
kubectl logs <pod> -n <namespace>
Images inside Minikube
minikube image ls
minikube image load <image:tag>
Kubernetes Goat
cd ~/kubernetes-goat
bash access-kubernetes-goat.sh
Final thoughts
The useful part of this setup is not whether the host system is Windows, Linux, or macOS. The important part is that the Kubernetes environment itself is predictable and disposable.
By putting the cluster inside an Ubuntu VM, the same workflow can be reused across different host operating systems:
Host OS
   -> Ubuntu
      -> Docker
         -> Minikube
            -> Kubernetes Goat
That gives you a controlled environment for experimenting with Kubernetes RBAC, service accounts, secrets, container security, internal networking, host mounts, privilege escalation paths, and cluster misconfigurations without turning your primary workstation into the lab itself.
One additional lesson from building this environment was particularly useful: a container image being available for your platform does not guarantee that every executable inside that image was built for your platform.
When Kubernetes reports an exec format error, inspect the binary itself before assuming that Docker, Minikube, or Kubernetes is broken.
That kind of debugging is also part of learning Kubernetes security.
References
Docker Engine for Ubuntu: https://docs.docker.com/engine/install/ubuntu/
Minikube: https://minikube.sigs.k8s.io/docs/start/
kubectl installation: https://kubernetes.io/docs/tasks/tools/install-kubectl-linux/
Kubernetes Goat: https://github.com/madhuakula/kubernetes-goat